This Halloween my daughter decided to be a Peacock Princess.
I took pictures along the way so you can duplicate this if you like.
Have fun!!!


First thing I did was design the costume with my daughter. She had complete input in this. Here is the original design we came up with. My princess is 7 years old and so this costume was built around her small frame. I am sure you can find ways to adjust it to the right size of your princess.

Because my daughter was helping me, I wanted to work in small steps.
We started with the mask. I have created a mask pattern for her cute 7-year old face, but you may need to adjust some. One thing I had to do different from the pattern is shorten the distance between eyes or the nose bridge. So, be sure to test the size and make adjustments.
You may download the pattern for free.
When sewing with felt, especially small little pieces, I often get frustrated with it shifting all over the place. If I try to pin it, I find it can bunch up and still end up uneven.
The solution is temporary spray adhesive that you can purchase at your local fabric/craft shop.
In the image below, I have only the beak is sewn. But nothing is actually sewn in place. I sprayed my felt pieces in place before I sewed them on... I was able to make sure I got these pieces just where I wanted them. One thing to remember when using the spray adhesive is to spray the back of the SMALLER piece. That way, you don't have to spray a large piece of felt, leaving the unused parts all sticky. Also, it was important for me to have a little extra body to the felt pieces (mask and feathers) so I added stabilizer (used in embroidery projects) in between each layer. This helps the mask and feathers keep shape... also used the spray adhesive on the stabilizer.

Next, you are going to want to topstich the different layers in place.
This probably goes without saying, but when you are doing your top stitching, line up the edge with your presser foot. This enables you to get a clean, straight edge.

Here is the top layer of the mask. Notice the eyes are not cut out yet. You want to wait to cut those out until you have added the final layer. If you gut the eyes out too early, the edges will wrinkle and shift around while you try to top stitch them. Once I have topstitched an area, I get my embroidery scissors and trim VERY close to the actual stitch. This cleans up the line and creates a finished look.

It was time to cut out the feathers. You can see I didn't stay with the originally planned "green" for the feathers. It just looked much better in brown. Using the spray adhesive, I placed the feathers and actually sewed around the paper. Then I cut it AFTER I had sewn it. Made it much easier to keep the shape of the feathers. And, yes, I used stabilizer in between layers here, as well.

I wasn't satisfied with the size of the "eye" of the feather that I had in the pattern, so I just made it a smidgen bigger for my personal preference. I stuck them onto the mask feathers and sewed around them like normal. I used a contrasting thread and sewed down the middle, just for visual interest. Once sewn, I trimmed around the edges as I have previously mentioned.

Once I had the top lay of the mask finished, I took a larger piece of purple felt to use for the back layer. This will be the BACK of the mask but I didn't want the stitching from the headband to show through. I created the headband with elastic (measured to my daughter's head) put inside a matching casing. Using the pattern, I figured out where the mask would line up and marked a place for the elastic headband to go. Next, I sprayed the back of the top layer with spray adhesive and carefully lined it up on the other side of this purple felt than the side shown.

Here is the mask all finished, pre-bling. If you look close, you can see how the edges are trimmed down very closely to the stitch. I didn't cut the eyes out until the very last step here.

Anytime you have a princess, you have to add bling, right? So, a trip to the craft store secured these fun "jewels" for the mask. I used E600 crafters glue to make sure these things won't budge. I let my daughter choose the colors and placement. It was really hard for me not to insist on a teal, oval jewel instead of the pink, round one but this way, she loves it much more. Plus, I think it is super cute.

Next was the crown (I wanted her to have stuff to play with while I finished the rest)
This was really simple. I got a crown in the "weddings" section of my craft store. With my 40% off coupon, this wasn't too expensive. Then, I found a spray of feathers that we the perfect size. I disconnected them from the felt semi-circle they were attached to and reattached them using, you guessed it, spray adhesive to a narrow piece of white felt. I used invisible thread and attached this behind the crown. Once it is on my daughters head, you can barely see it.

Now it was time for the feathers. You can download the feather pattern here.
I got all my feathers cut out as planned and then decided I really didn't like the colors. So, I played around with some variations and ultimately decided on the one you will see in a few frames.
Get your feather layers cut out.

First, cut out your first layer ONCE in the felt.
Second, cut out your stabilizer. Using the spray adhesive, secure the stabilizer to each piece 1st-layer feather piece.
Third, once the first piece of the first layer has the stabilizer fixed onto it, spray that piece again, on the stabilizer side.
Fourth, with stabilizer side down, attach these sticky feather pieces to a larger piece of matching felt.
You are now ready to stitch around the feathers, like we did for the mask feathers, and then cut them out - close to the edge.

After that, I used tailor's chalk* to draw some lines on the feathers where I wanted to sew. I really wanted these to be straight and uniform so I didn't want to eyeball it. I used a matching color for the front of the feather and a darker color for the bottom -- mostly because I was too lazy to wind another bobbin :)
* a word on tailor's chalk: I have been sewing for 30 years and have tried MANY different varieties of chalk. Most, if not all, that I would buy from fabric stores just wouldn't disappear like it claimed to. The favorite I ever used was at an alteration shop I worked at. You could mark with it and then, using an iron, make it disappear in seconds. I was thrilled when I found it on Amazon. The brand is Carmel Super-Glide tailors chalk. You can find it here (no, I don't get a kick back) but it is a large quantity.
Here you can see the white lines from the chalk before I press them off. It literally takes a nano-second for the chalk to disappear.

 |
| front |
 |
| back |
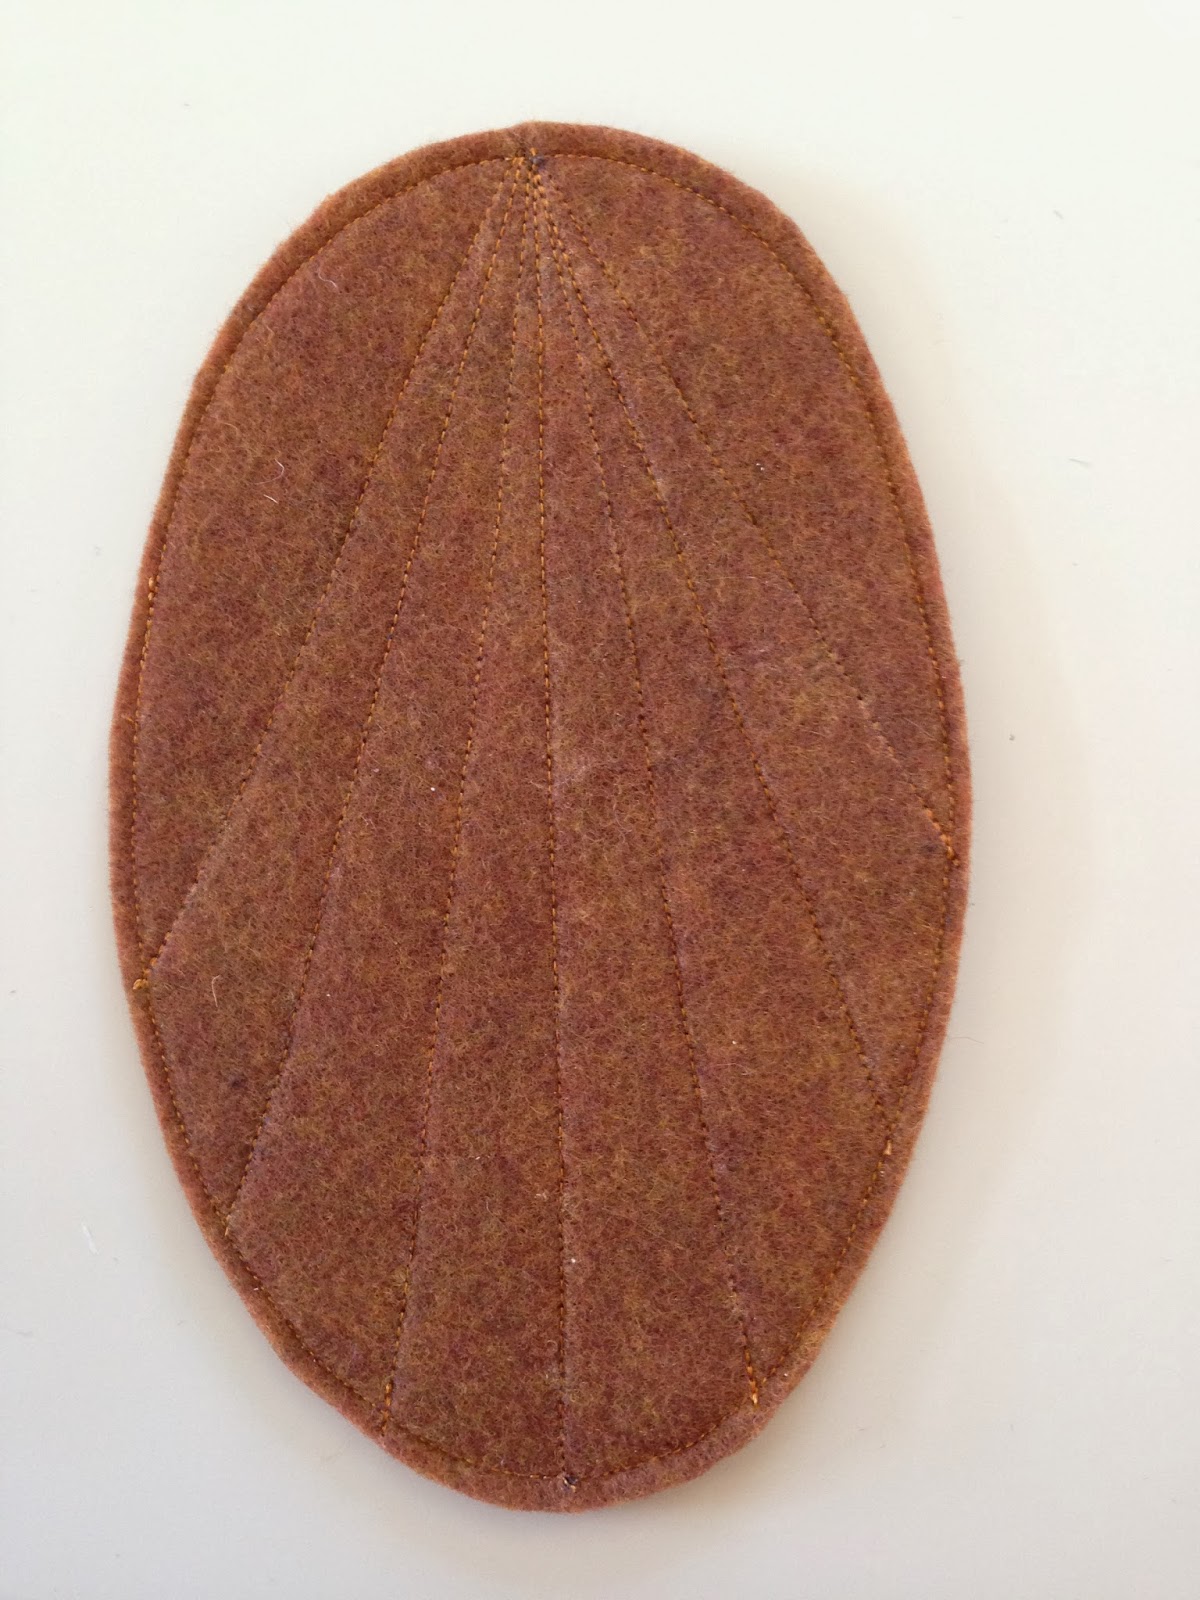
Next, I proceeded to add the other layers. You can see on the left side that I have not trimmed it yet after sewing. On the right, you can tell there is a vast improvement after trimming the edge.

Once I finished sewing all the layers on, it was time to add the bling!! So, I used clear glitter glue to highlight the lines on the first (brown) layer of the feathers. Then purple glitter glue to outline the top and final layer of the feathers. It adds just a bit of sparkle that brings a smile to my daughters face.

For the skirt, I just used a circle skirt pattern. Circle skirts are simple and you can measure them to your child's size. I cut this out in layers, of course, making each layer shorter than the one before it.
I used blue satin for the bottom layer, then, using tulle, added other. The colors of tulle I used were blue, purple, teal and lime green.
In this case, I had to lengthen the original pattern to make it long enough for my daughter - abotu 26" from waist to skirt edge.
Since we live where it is cold, I wanted the skirt to cover most her legs so she could wear long johns underneath.

I measured all the way around and used my tailor's chalk to mark my new line. Like I mentioned earlier, I just went shorter with each layer -- about 2.5-3" for each layer. You can choose what ever length of the layers you want.

When you cut your tulle, I would strongly suggest pinning the edges BEFORE you cut. (as shown in the photo below) Tulle moves around so much so if you can pin it, you save yourself a ton of trouble.

Once I had every layer cut out and side seams sewn, I carefully pinned each layer together. This is HUGE because if you don't, your layers will shift and move all over while you sew them. Take a few extra minutes to be sure this is done. Then, with the pins in, sew a stay-stich around the whole waist. This way, you are not trying juggle pins. And, if your gathers come out, you will still have all the pieces attached together.

When you sew your gathering stitch, be sure you do a double row of stitches. Keep them evenly spaced. Then, when you sew on your bodice, you will sew right in the middle of these two gathering stitches which will make your gathers look wonderful. Also, one little tip, when sewing gathering stitches, I like to choose a color of thread that is no where else in the garment. That makes it much easier to see what you need to pull.

For what ever reason, I didn't get a picture of the bodice alone. I just used a pattern from a leotard I had in my patterns. I cut it off at the hip -- leaving off the bottom part. Then I attached the bodice to the skirt. Oh, and before I attached the bodice to the skirt, I sewed brown ribbon onto the waist of the skirt. I used these ribbons to attache the feathers later on.
Next I made the ruffles and edging for the neck and sleeves. For the ruffles, I just doubled the length for the ruffle. For example, the sleeve opening was 6" so I cut the ruffle 12" long. The width of the sleeve ruffle was 3" inches before it was doubled over and the neck ruffle was 6" inches before it was doubled over. I made some biased tape out of contrasting fabric to edge the neck and sleeves

Gather, pin and sew the ruffle in place. Then using your homemade bias tape, cover the edges.

Finally, I sewed the feathers onto the ribbons I had attached to the skirt.
That's it. Here is the finished Peacock Princess Costume.
Good Luck. Post your questions below and I will try to answer them as I am able.

